
Intro
In this tutorial, I’m going to show you how to create a terrain shader in Unity with Shader Sandwich. In this example, we will make an unlit shader, but of course you can make all kind of terrain shaders with this technique. The shader can handle up to 4 textures.
Index
- Terrain setup
- Shader Sandwich setup
- Adding the first texture
- Adding the second texture
- Adding the control masks
- Finalizing the shader
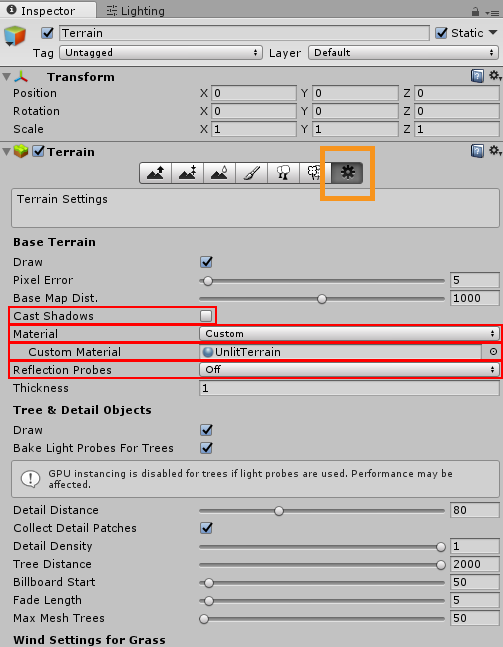
Terrain setup
We start by creating a new empty scene, in the new scene we will create a new terrain. In the terrain options, we will disable Cast Shadows and set the Material to Custom. In the project folder, we will make a new material and assign it to the Custom slot. We can also disable the Reflection probes as we are not going to use it. And lastly, we already add one texture to the terrain.

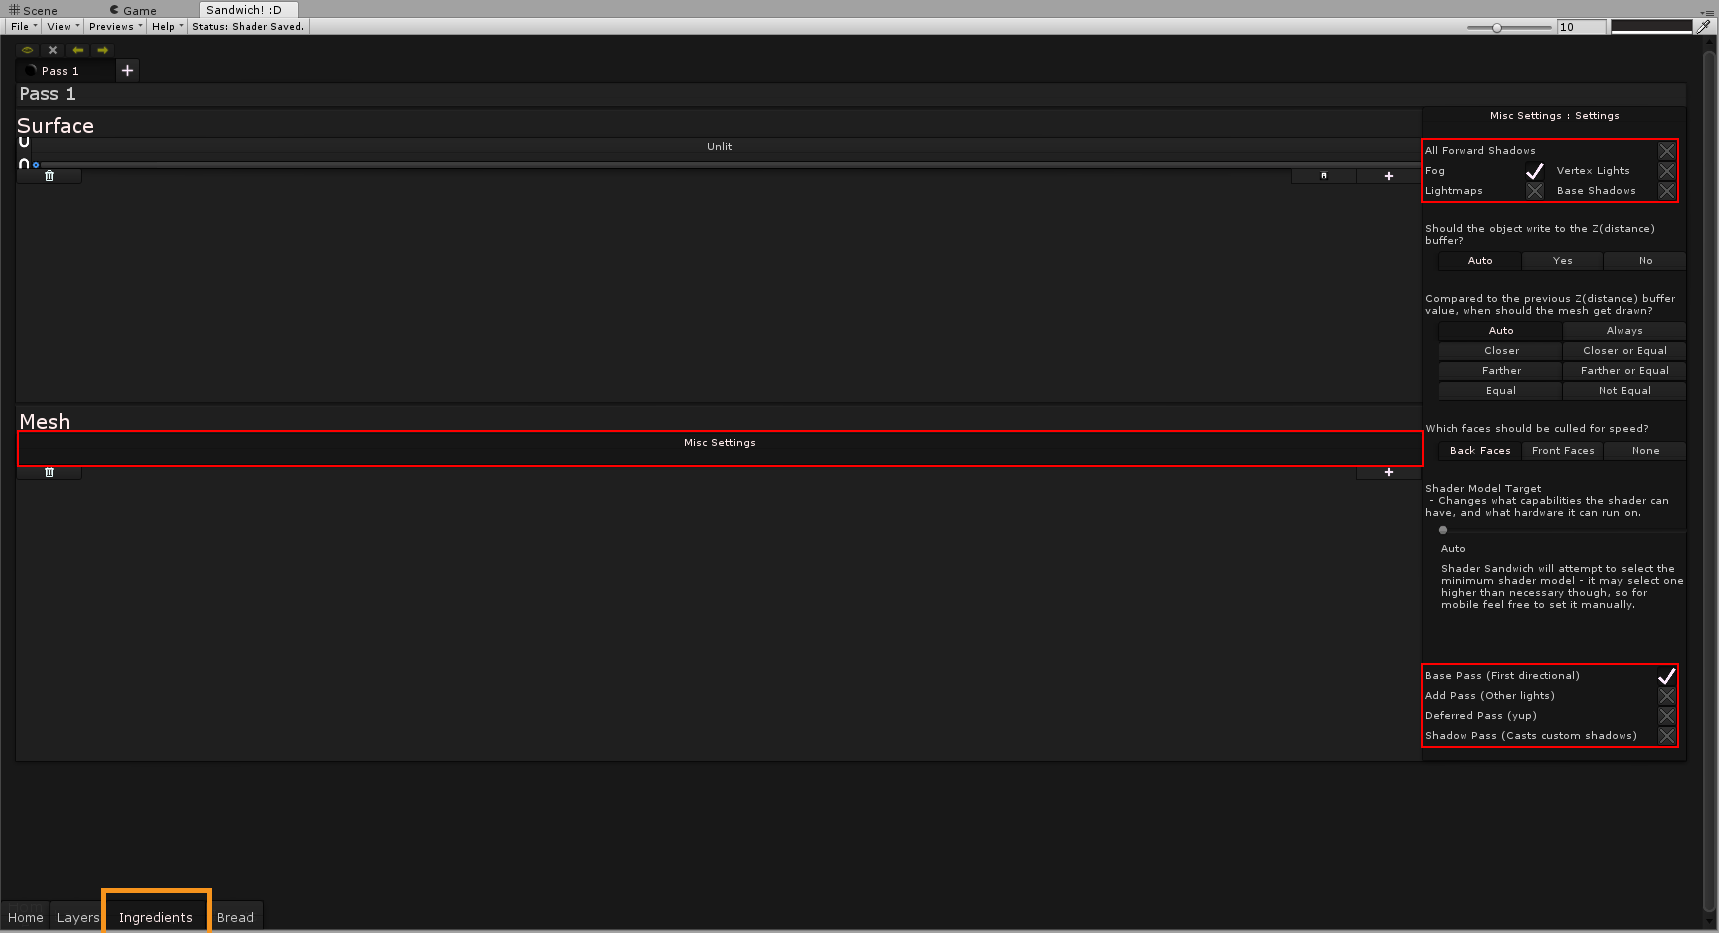
Shader Sandwich setup
Now we will setup the basic settings for our shader in Shader Sandwich. Let’s start off by making a new shader, in the ingredients tab we see the Surface and Mesh slots. We can remove the Diffuse and Specular slots and add a new Unlit one. Then under the Mesh slot we click on the Misc Settings, here we will disable all the things we don’t need: All Forward Shadows, Lightmaps, Vertex Lights, Base Shadows and all the way to the bottom we will disable: Add Pass, Deferred Pass, Shadow Pass.

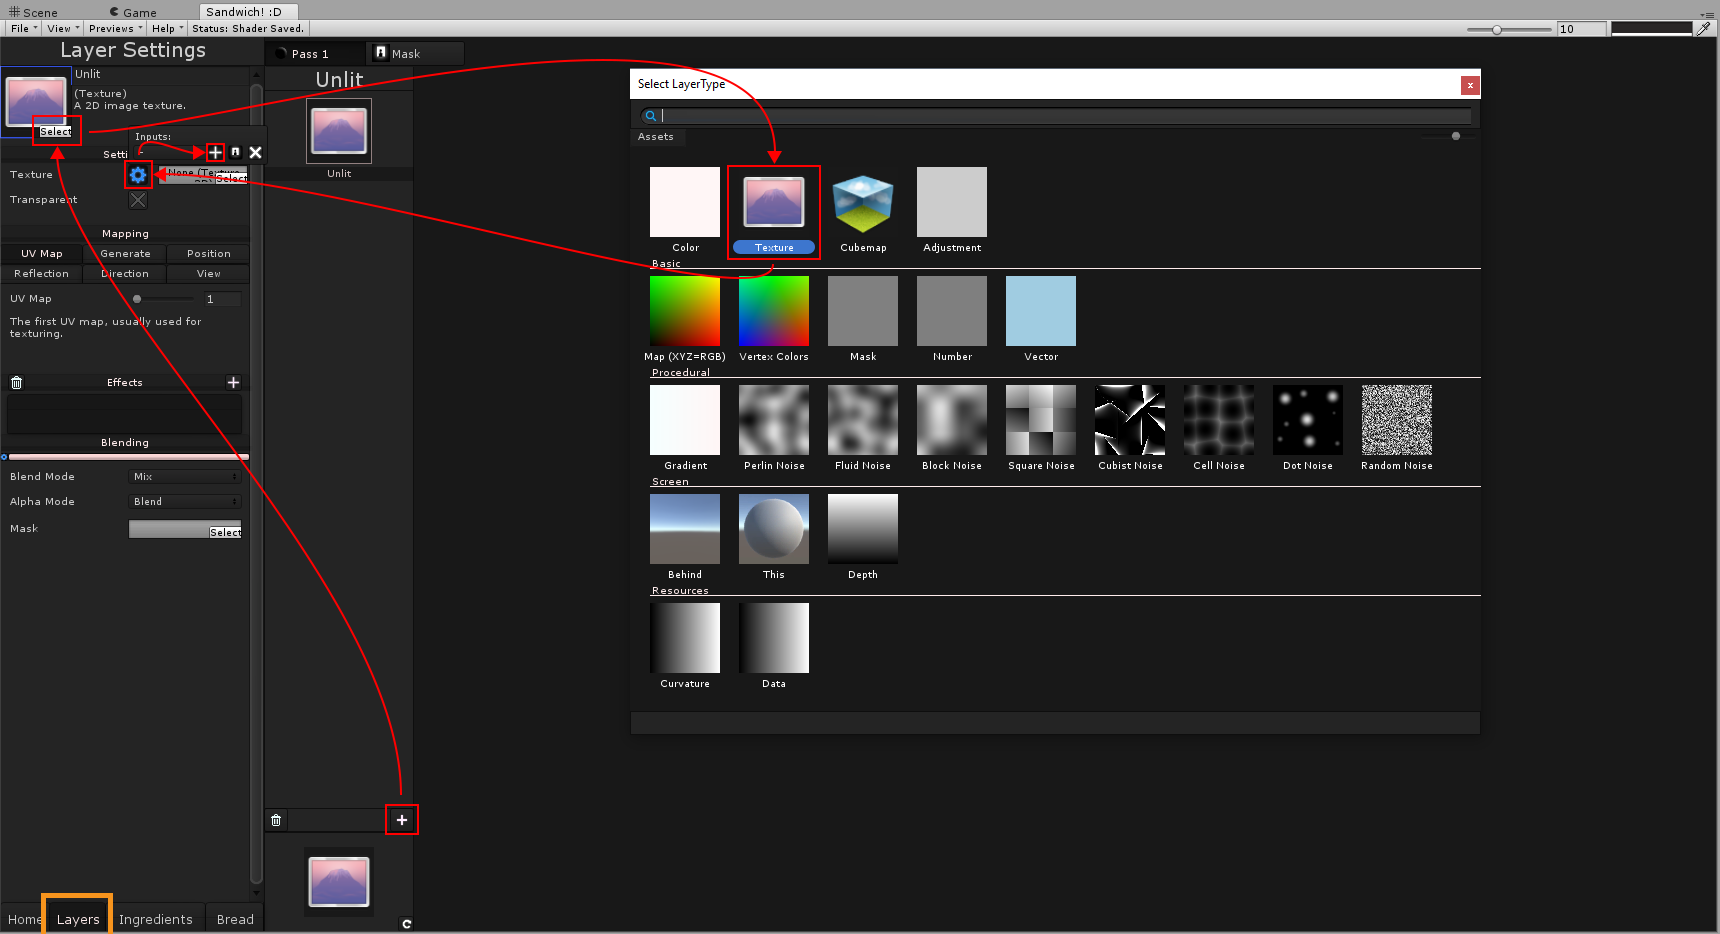
Adding the first texture
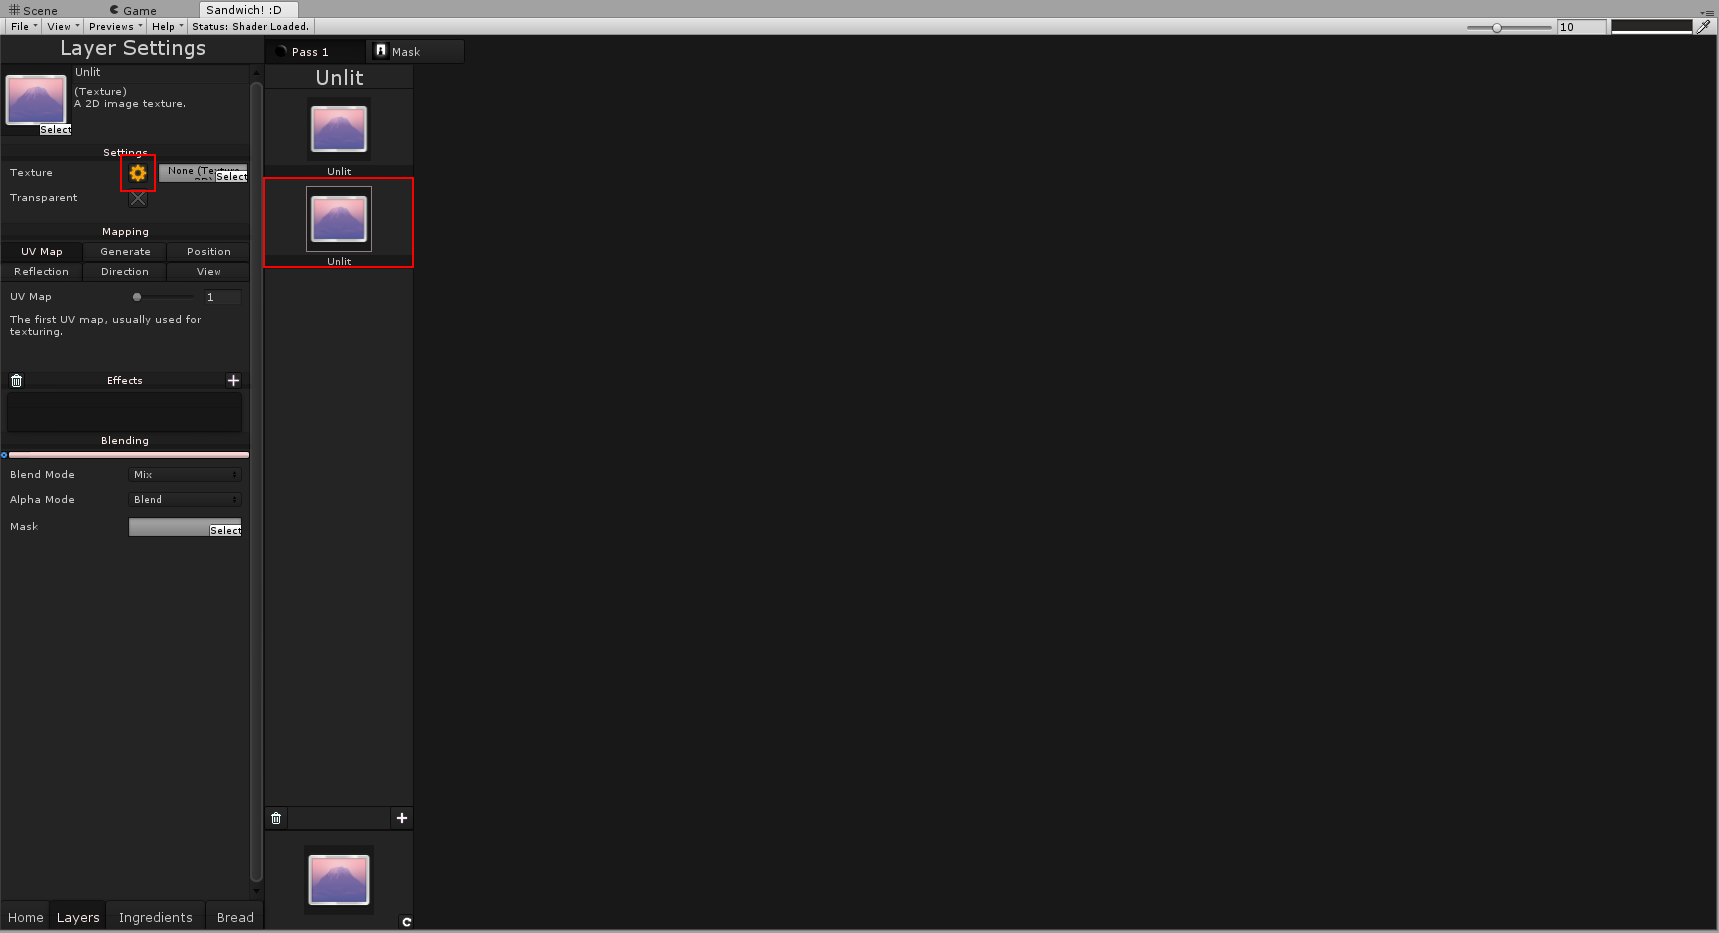
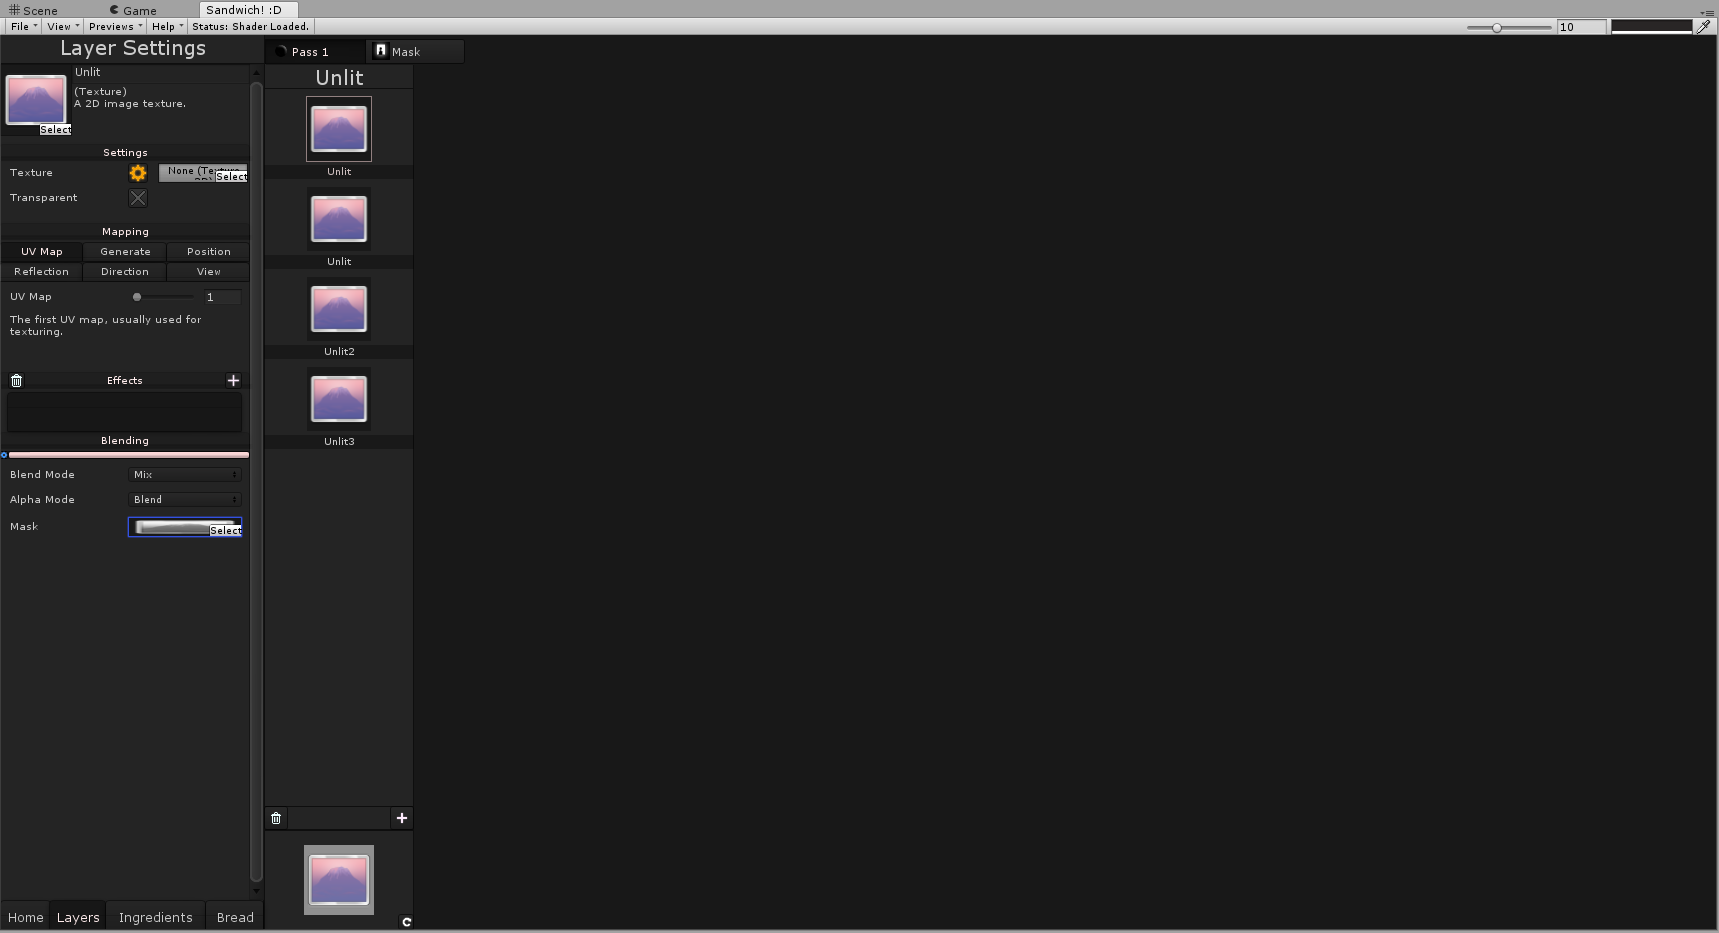
We need to add a texture input, so let’s add the first texture and make a new input for it. Go to the Layer tab and press the + button, set the layer type to Texture and add a new input by clicking the gear icon.
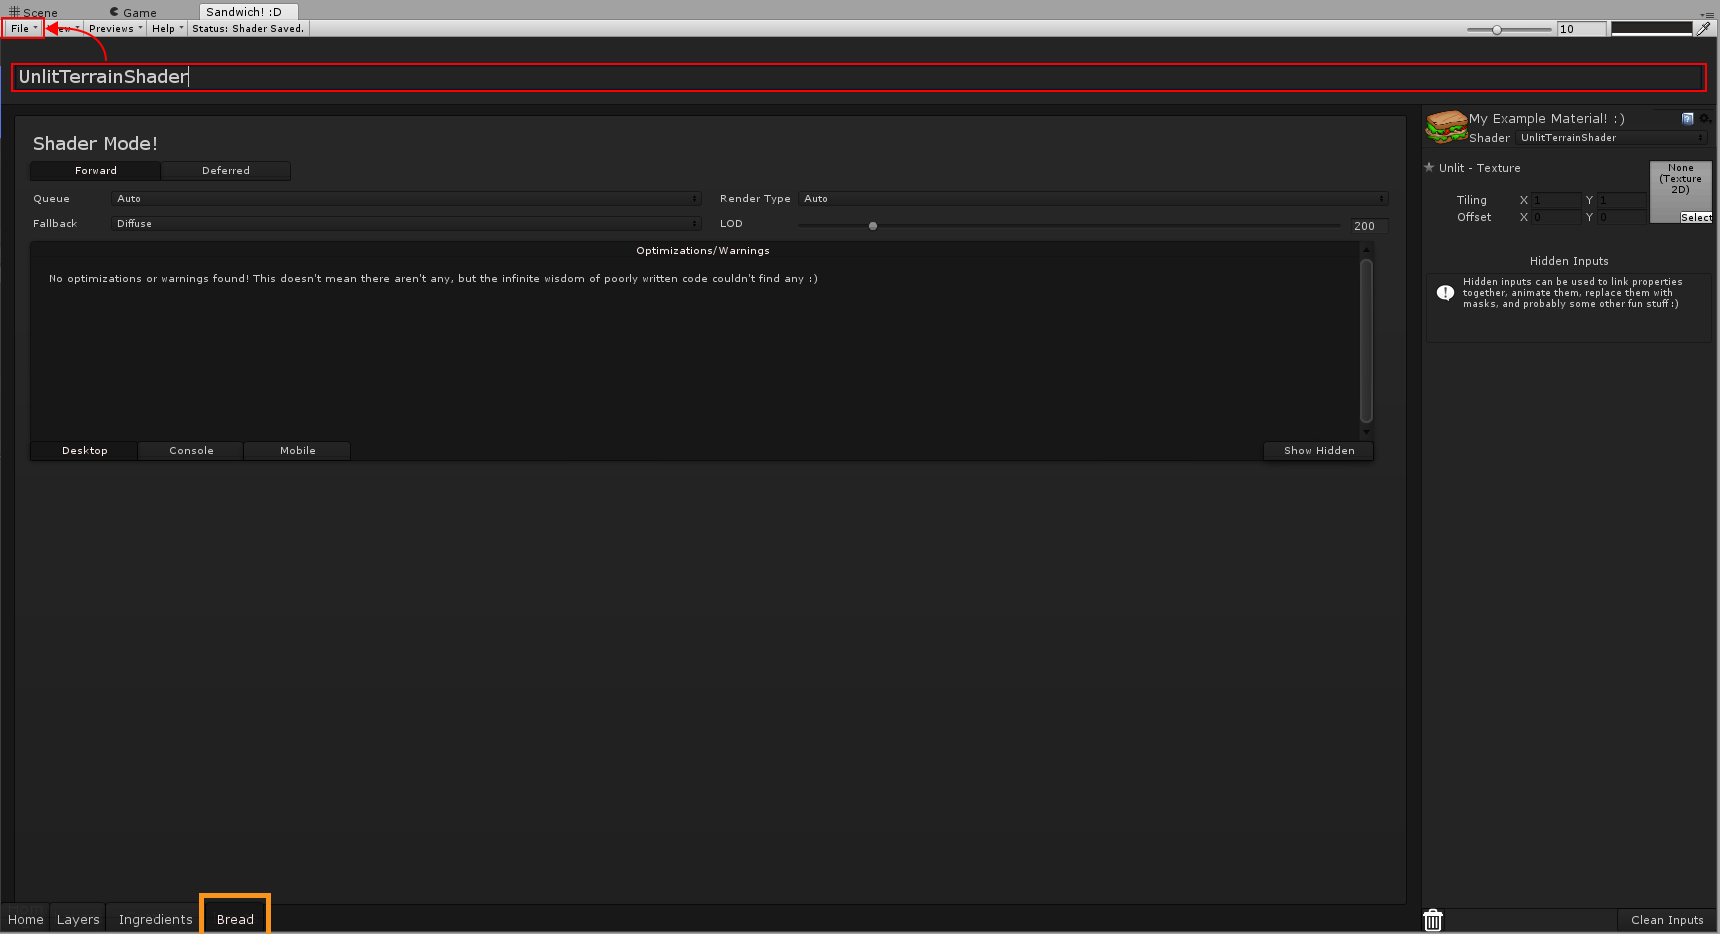
In the Bread tab, we can give our shader a name and save it.
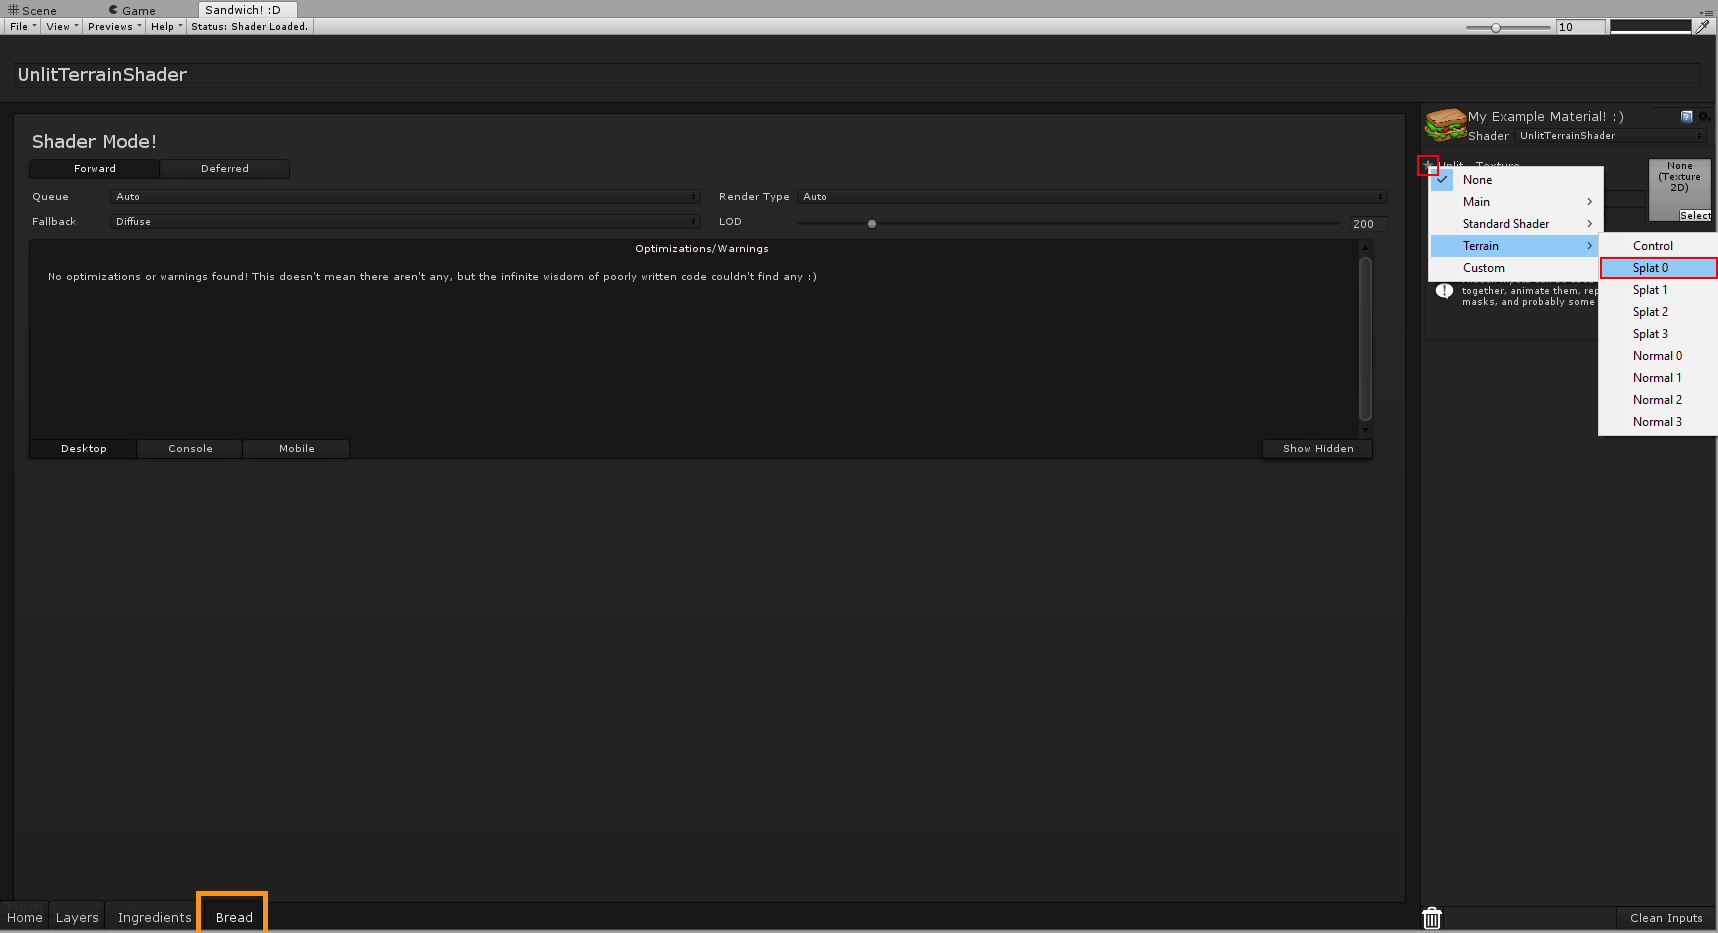
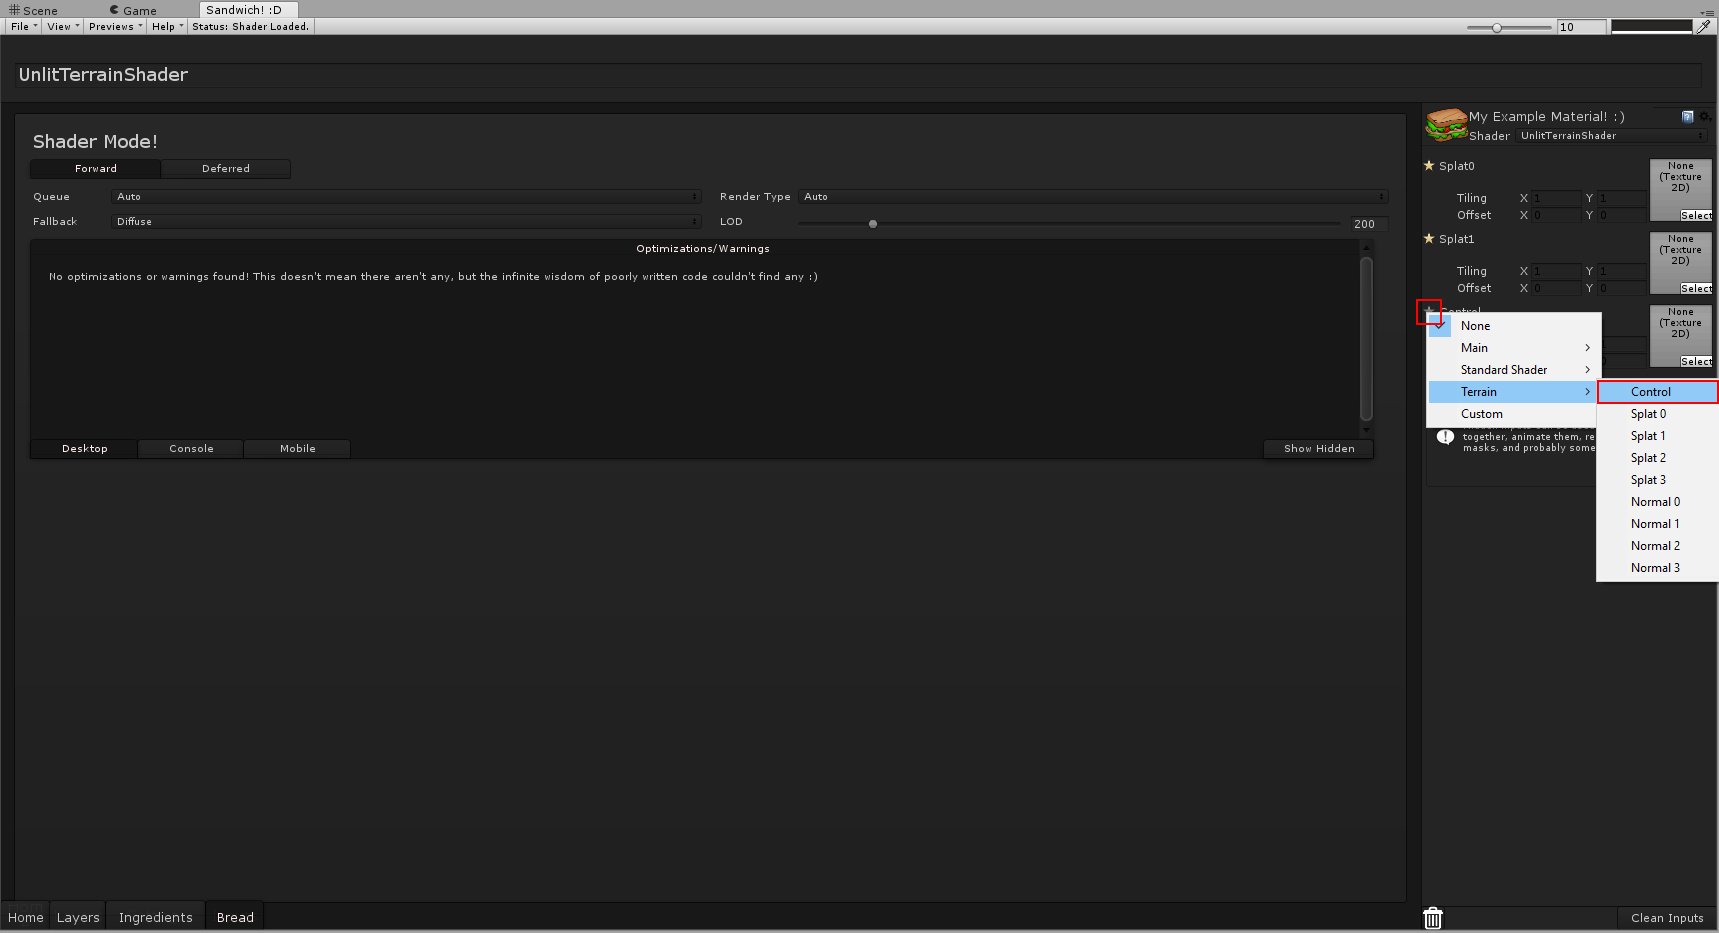
If we assign the new shader to the material we can see that the terrain turns ‘unlit’ white, that is good but we still aren’t able to paint the texture onto the terrain. That is because we have to set the texture input to one that the terrain uses. Unity’s terrain uses Splat maps to assign textures. Fortunately, Shader Sandwich has made these inputs for us already. So, we only must assign it to our texture input, we can do that by clicking the little star icon -> Terrain -> Splat0. Save again and now we will see it appear on the terrain.
Adding the second texture
New the shader supports only one texture, to make it use more, you guessed it; we have to add another texture. To do this repeat the previous step but instead of assigning Splat0 to it we must assign Splat1. If we save this and add a new texture to the terrain we will see that we still only see one texture and that we can’t paint another one. To achieve this, we must add a Control Mask.
Adding the control mask
The Control Maks (SplatMap) is a texture that keeps track of which texture is painted where and saves the data in 4 values R(ed)G(reen)B(lue)A(lpha). In Shader Sandwich we can use these values to mask the textures.
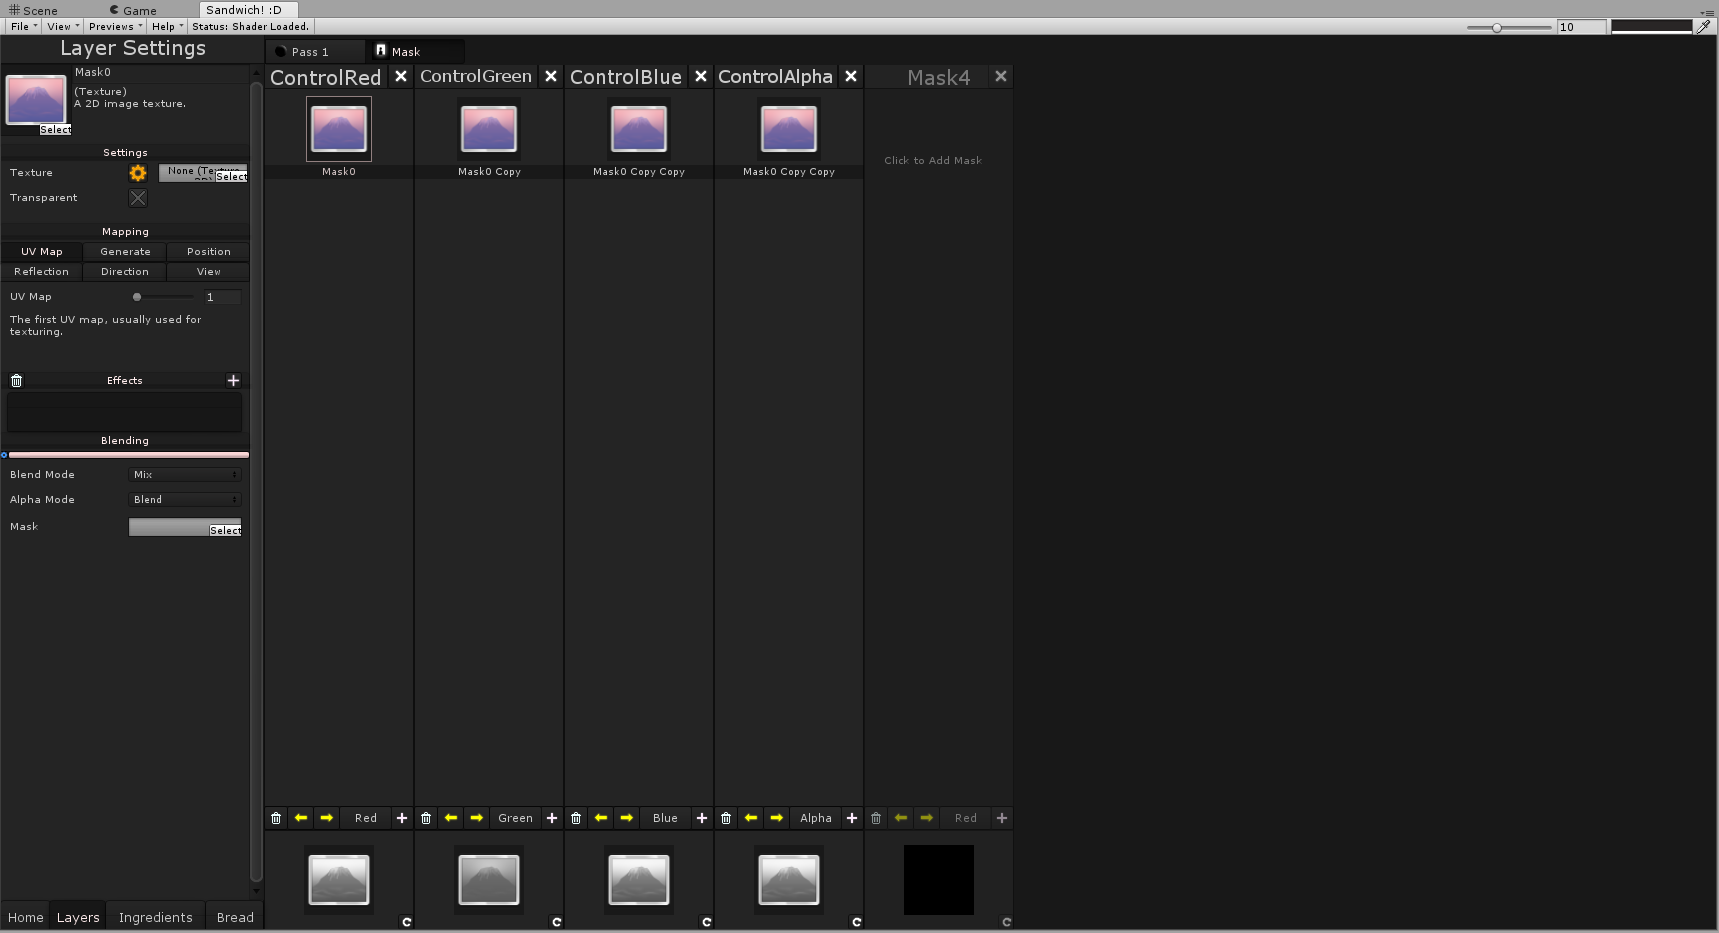
We can do this by going to the Mask tab, add a new texture, and assign a new input to it.
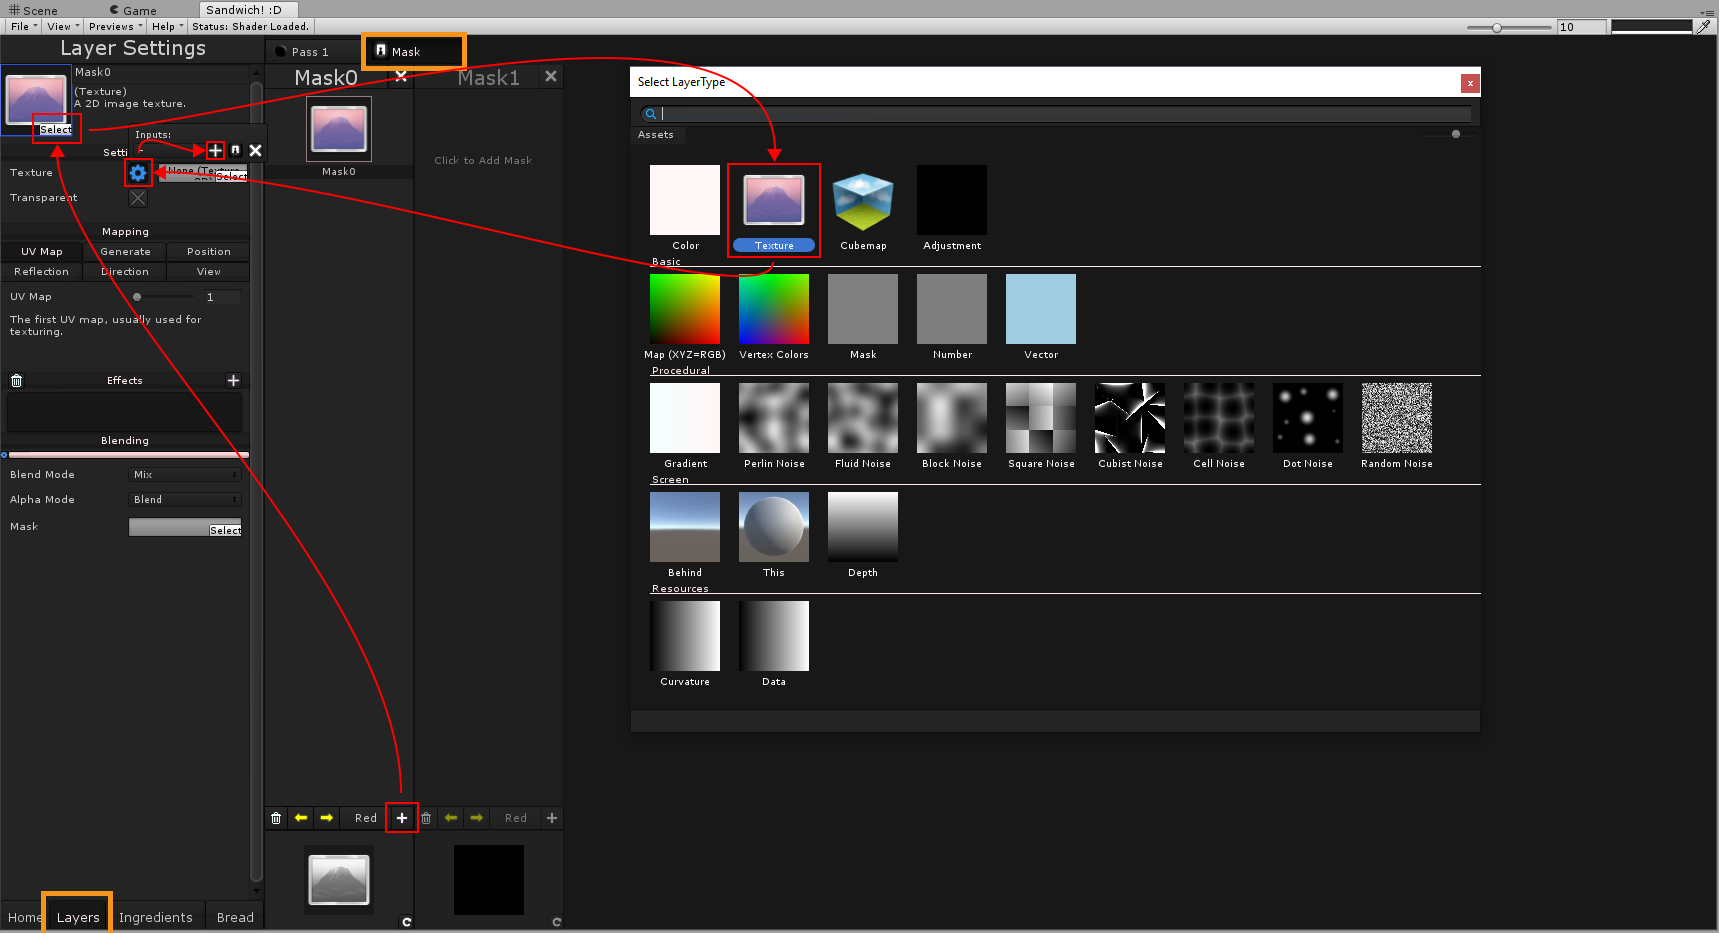
This one is set to output the red channel, to output the green channel we will create a new mask, set the output channel to green and copy/place the first mask into it. (Now these textures have the same input, or otherwise said they are the same texture but output a different value.)
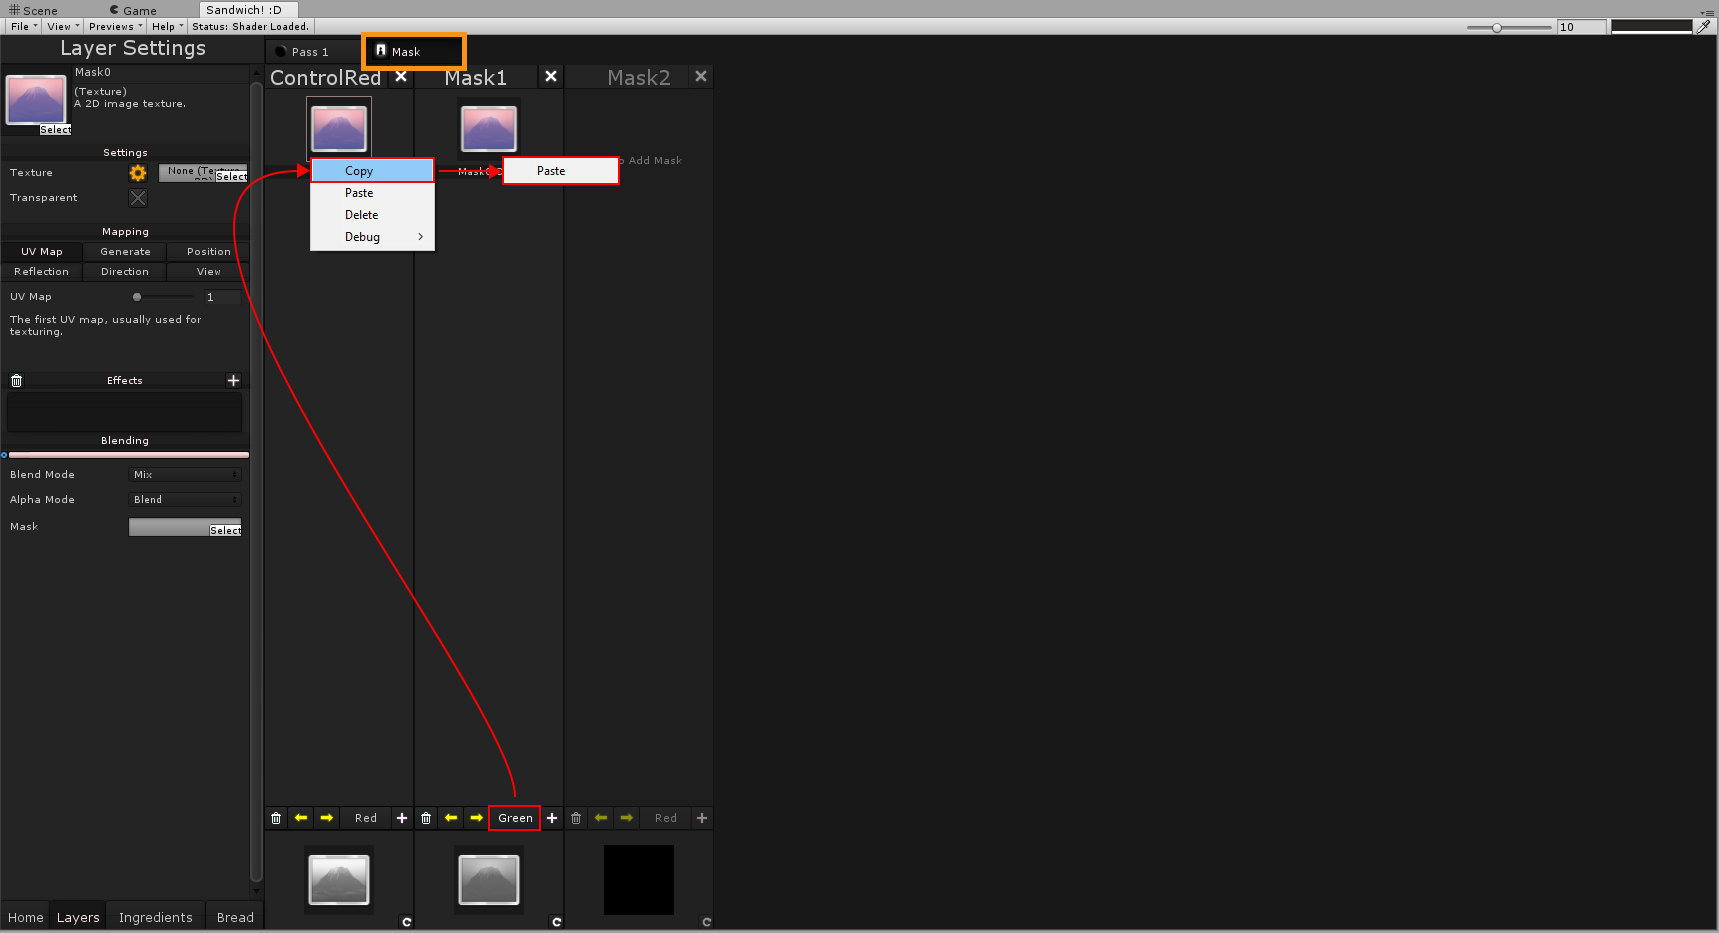
To use the masks, we can go back to the Pass1 tab and assign them to the textures. The red one to the first and the green one to the second texture.
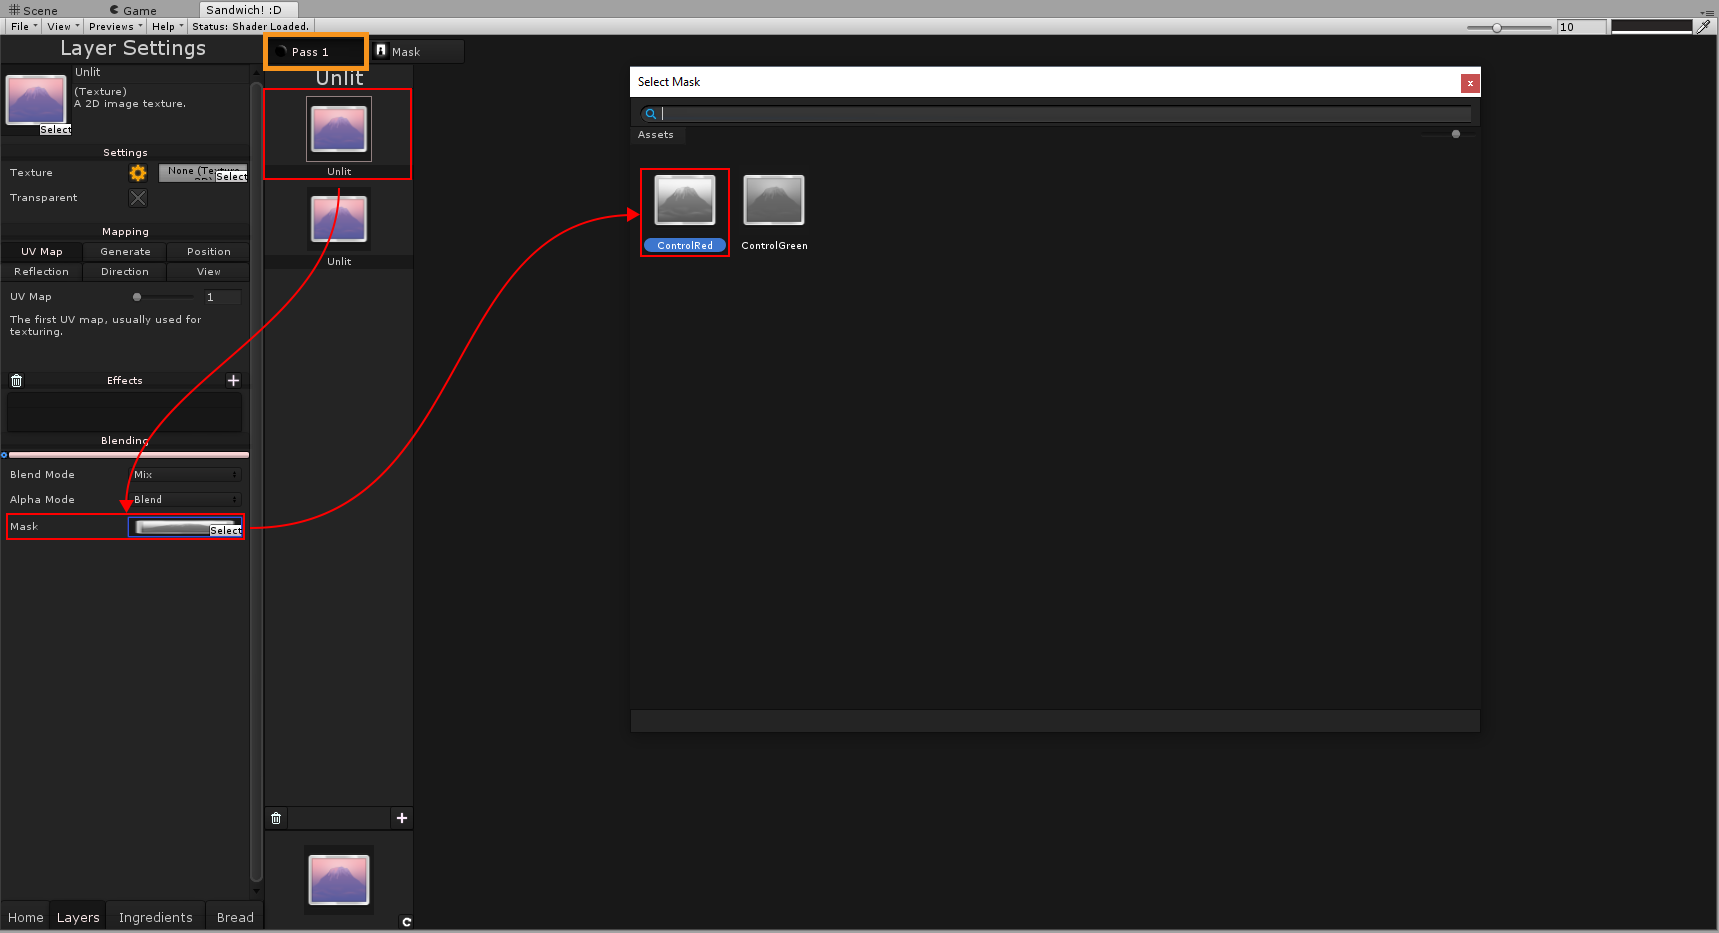
Now there is one thing left to do and that is to assign the masks to the control input, in the Bread tab -> star icon -> Terrain -> Control.
Finalizing the shader
Congratulations, if we save the shader and have a look at the terrain we can see that we are able to paint the 2 textures!
To complete the shader you could add the last 2 textures by repeating these steps. The final shader should be looking like this:

Having any troubles? You can watch this video to see the full process or you can contact me by leaving a comment down below.